
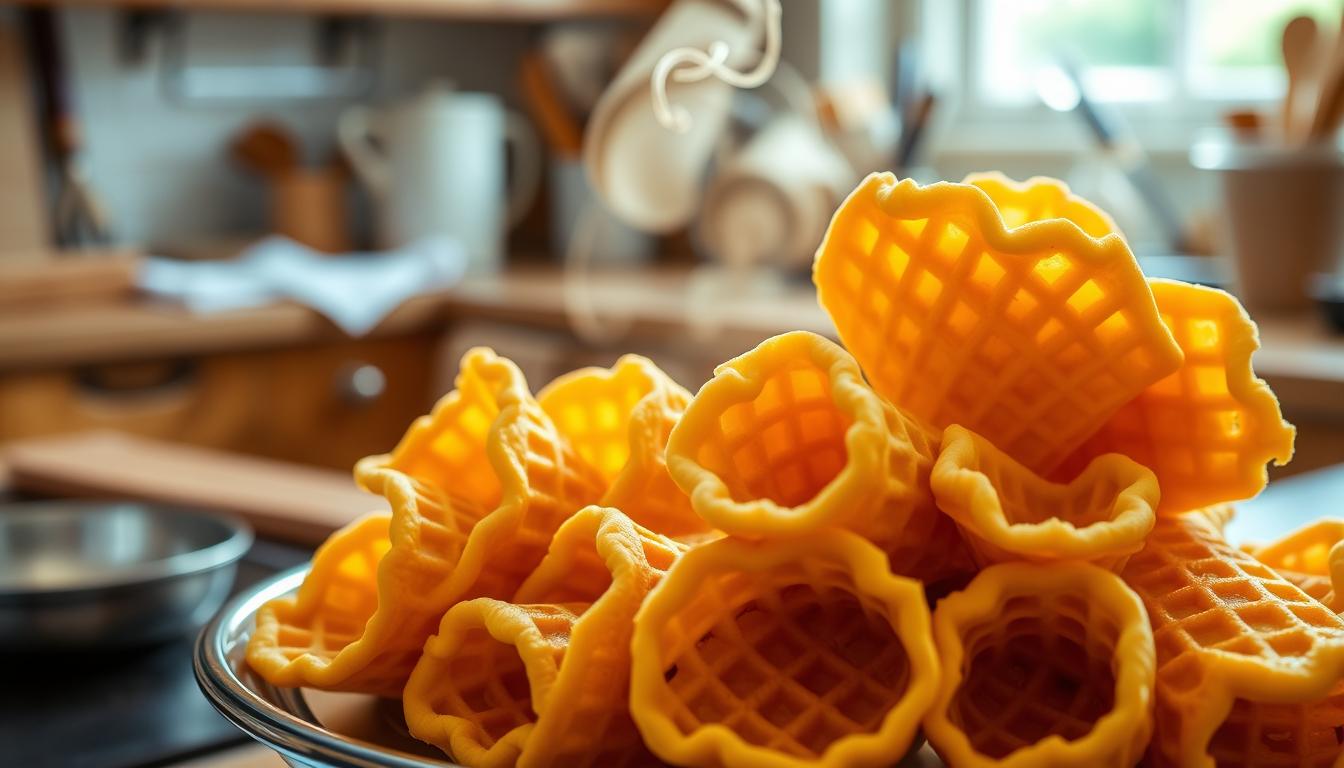
Imagine biting into a crispy, homemade ice cream cone filled with your favorite flavor. The sweetness of the cone, the coldness of the treat, and the joy of making it yourself is unmatched.

Making your own homemade ice cream cones is surprisingly easy. With a simple ice cream cone recipe, you can make delicious treats that fit your taste. Homemade cones are perfect for satisfying a sweet tooth or for a fun family activity.
Key Takeaways
- Learn a simple recipe for making homemade ice cream cones.
- Customize your cones with your favorite flavors and ingredients.
- Enjoy a fun and easy activity to do with your family.
- Create delicious treats that are perfect for hot summer days.
- Impress your friends and family with your homemade cones.
Why Make Your Own Ice Cream Cones?
Making homemade waffle cones is a simple way to make your ice cream better. You get to choose what goes into your cones. This means you can make them just the way you like them.
Benefits of Homemade Cones
There are many good things about making your own ice cream cones. You can pick the ingredients, so your cones are always fresh and without preservatives. Plus, you can change the flavor and texture to fit your taste. This is great if you need to make cones for someone with special dietary needs.
Freshness is a big plus of homemade cones. Unlike store-bought ones that might be old, your cones will be ready in minutes.
Store-Bought vs. Homemade Comparison
Store-bought cones and homemade ones are quite different. Store-bought cones can be dry and lack the personal touch. Homemade cones, on the other hand, are fresh and can be made just for you. To make waffle cones at home, you just need a few ingredients and some basic kitchen tools.
Essential Ingredients for the Perfect Ice Cream Cone Recipe
Making tasty ice cream cones at home begins with the right ingredients. Whether you're making a classic waffle cone or trying new flavors, the quality of your cones depends on the basics.
Basic Ingredients List
The key to a great ice cream cone is simple. You need flour, sugar, eggs, and milk. You'll also need baking powder and a pinch of salt for extra flavor. For a classic waffle cone, you'll need:
- 2 cups all-purpose flour
- 1/2 cup granulated sugar
- 3 large eggs
- 1 cup milk
- 1/4 teaspoon salt
- 1/2 teaspoon baking powder
Ingredient Substitutions and Alternatives
Not everyone can use the standard ingredients due to dietary restrictions. Luckily, there are alternatives. For a gluten-free cone, use gluten-free flour. If you're vegan, replace eggs with flaxseed or chia seeds mixed with water, and use a non-dairy milk. Experimenting with different milks like almond or coconut milk can also add unique flavors to your cones.

Equipment You'll Need
To make ice cream cones, you'll need a few pieces of equipment. A mixing bowl, whisk, and measuring cups are essentials. If you have a waffle maker, it will simplify the process, but you can also make cones without one – a non-stick skillet or oven will do. Using the right equipment can make a big difference in the quality of your cones.
With the right ingredients and equipment, you're ready to make delicious homemade ice cream cones. Everyone will love them.
Step-by-Step Ice Cream Cone Recipe
Follow this guide to make tasty homemade ice cream cones. Making your own cones is fun and lets you choose the flavor and texture you like.
Preparing the Batter
To begin, mix the batter for your cones. In a big bowl, whisk together 1 1/2 cups of all-purpose flour, 1/2 cup of granulated sugar, and 1/4 teaspoon of salt. In another bowl, mix 1/2 cup of milk, 1/4 cup of melted butter, and 2 large eggs. Add the wet ingredients to the dry ones, whisking until it's smooth. The batter should be thin and lump-free.
For better batter, use room temperature ingredients. Don't overmix and let it rest for 30 minutes. This helps the flour soak up the liquid.
Cooking the Cones
To cook the cones, use a waffle cone maker or a non-stick skillet. Follow the maker's instructions for temperature and time. Cook for 2-3 minutes, or until they're golden and crispy. For a skillet, heat it over medium and cook for 30 seconds on each side.
Shaping Techniques
Shape the cones while they're warm. Use a cone-shaped mold or a clean glass. Wrap the cone around the mold, forming a cone shape. Hold it for a few seconds until it sets, then remove it. Do this for each cone.
- Shape the cones gently to avoid breaking them.
- If cones cool and become brittle, reheat them briefly to make them pliable.
- Try different shapes and sizes for unique cones.
Cooling and Setting
Let the cones cool completely on a wire rack. This makes them crispy. Be patient, as cooling affects their texture and stability.
Store cooled cones in an airtight container to keep them fresh. Enjoy them within a day or two, as they can become stale or soggy.
How to Make Waffle Cones Without a Waffle Maker
You don't need a waffle maker to make crispy, homemade waffle cones. With simple techniques and basic kitchen tools, you can make tasty waffle cones. They're perfect for scooping your favorite ice cream.
Using a Skillet Method
One way to make waffle cones without a waffle maker is by using a skillet. First, preheat a non-stick skillet over medium heat. While it heats up, prepare your waffle cone batter.
Once the skillet is hot, pour a small amount of batter onto the center. Tilt the skillet to spread the batter evenly into a thin layer. Cook for 2-3 minutes, or until the edges curl and the surface is dry.
Use a spatula to loosen the cone and flip it over. Cook for another minute, then remove it. Quickly shape the cooked waffle into a cone and let it cool.
Oven-Baked Alternative
For a hands-off method, make waffle cones in the oven. Preheat your oven to 375°F (190°C). Spread a thin layer of batter onto a parchment-lined baking sheet, creating a circular shape with a spatula. Bake for 5-7 minutes, or until the edges are golden brown.
Remove the waffle from the oven and shape it into a cone. Use a cone-shaped mold or shape it by hand. Hold the cone in shape until it cools and sets.
Troubleshooting Common Issues
When making waffle cones without a waffle maker, you might face some challenges. Here are common issues and their solutions:
- Batter too thick: Thin out the batter with a small amount of water or milk.
- Cone too fragile: Add a bit more flour to the batter to strengthen the cone.
- Cone doesn't hold shape: Shape the cone while it's warm, and hold it until it cools.
By following these tips and techniques, you can make delicious waffle cones at home without a waffle maker. Enjoy experimenting with different flavors and decorating your cones to make them special.
Flavor Variations and Decorating Ideas
Now that you know how to make homemade ice cream cones, it's time to get creative. You can try different flavors and decorations to make your cones unique. Whether you prefer classic tastes or something new, the options are endless.
Sweet and Savory Cone Flavors
Try out different flavors to take your homemade ice cream cones to the next level. You can go for classic vanilla and chocolate or try something adventurous. The choices are limitless.
Chocolate and Vanilla Variations
Chocolate fans might enjoy a pinch of sea salt or caramel drizzle. Vanilla cones can get a boost from lemon zest or cinnamon.
Specialty Flavors
Think about using matcha, strawberry, or pistachio for a unique twist. You can also mix flavors to create something entirely new.
Decorating Your Homemade Cones
Decorating your cones is as fun as making them. There are many ways to make them look great.
Dipping and Coating Techniques
Dipping cones in melted chocolate or sprinkles adds a nice touch. You can also try coatings like crushed nuts or shredded coconut.
Sprinkles and Toppings
Adding sprinkles, chopped nuts, or candy pieces makes cones more fun. Just remember to have fun and be creative with your choices.
Conclusion
Now you know how to make ice cream cones at home. This simple recipe lets you enjoy homemade treats anytime. Try different flavors and decorations to make your cones special.
Using a waffle maker or other methods like a skillet or oven is fun. It lets you customize and be creative. So, experiment with new recipes and add your own twist.
As you get better at making ice cream cones, you'll love the feeling of creating something special. So, why wait? Start making your own cones today and enjoy the sweet success!
FAQ
How do you make waffle cones?
First, prepare a batter. Then, cook it in a waffle iron or another method. Shape the cones while they're warm.
Can you make waffle cones without a waffle maker?
Yes, you can. Use a skillet or oven-baking instead of a waffle maker.
What are some common issues when making homemade ice cream cones?
Issues include cones that are too brittle or too soft. Also, getting the perfect shape can be hard. But, there are tips to fix these problems.
How do you make homemade waffle cones crispy?
Cook them until they're golden brown. Then, cool them down properly. Baking them in the oven for a few minutes can also help.
What are some flavor variations for homemade ice cream cones?
Try different flavors like chocolate, vanilla, or cinnamon. You can also experiment with savory options.
How do you decorate homemade ice cream cones?
Decorate them by dipping and coating. Add sprinkles and toppings. Or, get creative with your own ideas.
Can you make homemade ice cream cones in advance?
Yes, you can make them ahead of time. Just store them in an airtight container to keep them fresh and crispy.
Comments
Post a Comment